by Randy Baril, Regional Manager
One of the things I love about brewing with extracts is that it’s so easy to do. About half of the beer I brew is extract for this very reason. Using fresh ingredients and proper technique, even the most vociferous all-grain partisan would be hard-pressed to identify that your beer used this convenient short-cut. Here’s what my extract brew day looks like – from the initial throw of the tap to start filling my kettle to completely cleaned up in 2½ hours!
Equipment
My extract brewing toolkit is a bit different from my all-grain or Brewvit™ equipment. I like to keep it simple using the following basic kitchen implements:
- 10 Quart stock pot, stainless steel, slightly oversized, with lid
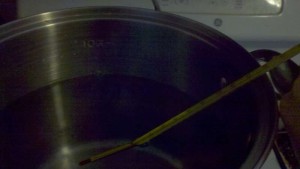
- Laboratory thermometer (what, you don’t have one in your kitchen?)
- Kitchen scale, be it analog or digital, 5kg capacity
- a variety of Tupperware containers
- Stainless steel mesh strainer (OK, so the big one came from my brewing gear)
- Whisk
- Stainless steel spoon (I use a big one from my brewing gear but a smaller one works fine)
- Hose that attaches to my kitchen faucet with an adapter
- 6.5 gallon fermenting bucket with lid & airlock
No BoilBooster™, no wort chiller, not even a very big pot. The second-to-last piece is specialty but makes the brew day much less messy. You could just use a pitcher or small pot to move the water around.
Ingredients
Today we brew Liquid Dessert. This edition of my award-winning Chocolate Porter was made possible by Eric Parkes over at Somerville Chocolate at the Aeronaut Foods Hub. I convinced him to spare me some of his cocao hulls and fines, a byproduct of the chocolate-making process. It had been a while since I had access to such a fresh supply making this the only recipe I considered brewing on my rare brew day.
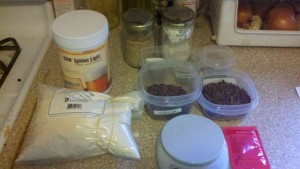
- Specialty Grains: 12 oz De-Husked Carafa II, 8 oz Crystal 60L, 6 oz Chocolate Wheat malt, 6 oz Chocolate malt
- Extracts: 3.3# can of Briess Golden Light LME & 2# of Briess Golden Light DME
- Hops: ¾ oz Magnum hop pellets @ 12.0% AA and one ½ oz Fuggle plug
- Spice: 4 oz Cocao hulls & fines
- Process Aids: ½ tsp Whirlfloc (copper fining), ½ tsp YeastX (yeast nutrient)
- Yeast: Fermentis US-05 dry yeast packet
My Brew Day
Brew day starts early, campers! Rise and shine at 7:20 AM if you want to be sure to have the afternoon to play. While 2½ hours is the goal, Murphy’s Law still applies. Start early for the least amount of conflict in the kitchen.
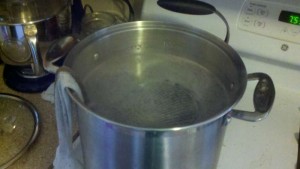
I happen to live in Watertown, MA, which means that I am served by the Massachusetts Water Resource Authority, MWRA, one of the best providers of municipal water in the country. Boston water comes in relatively low mineral and very low chlorine due to early adoption of ozonation as the primary disinfection method for their system. This means that it is a blank slate upon which I can easily paint whatever water profile I wish. In the case of this beer, I leave it alone. The malt extract comes with some minerality from the Wisconsin water used to make it, which is sufficient.
I also don’t fuss about cold vs. hot tap water. We use enough hot water in our household that we’d know if there was any funky action happening in our propane-fired water heater. There isn’t, so I don’t worry about it. That fills the kettle at about 130’F, which I then raise to 165’F. This is a bit higher than the 155’F I want to steep my grains, but the water (technically brewing liquor at this point) quickly falls back into the desired range due to the addition of 1½-2# of room temperature (~70’F) thermal mass. This takes about 10-15 minutes.
This is no time to lollygag around! Take this time to weigh out your ingredients and get all of your kettle additions staged. As the French would say, you want to mise en place. Remember to stage your hop additions from last to first so that when you grab from the top you’re getting your bittering strike and not your aromatic strike!
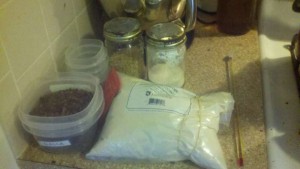 Consolidating the goods is also good etiquette should someone else desire to use the kitchen in the morning, a reasonable request. Minimize your footprint to make brewing light on the entire household. For me, this means fitting everything on that useless tiny counterspace on the other side of the stove.
By now your kettle should have warmed sufficiently, let’s start the grain steeping. Turn off the burner! While 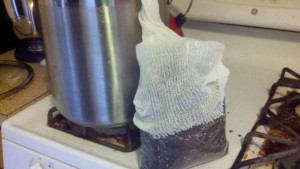 small muslin bags are great and everything, it’s just easier to use a large one. For 60¢ extra you don’t have to try to squeeze everything in. I like to envelop the bag right next to my kettle, then invert the whole thing so that all of the fine dust falls into the kettle. I paid for that dust and I want the flavor from it!
 Steeping is for 10-15 minutes, or as I like to think of it, just enough time to warm up the liquid malt extracts! Every few minutes I’ll return and tease the bag up and down to encourage circulation throughout. This is to maximize the flavors that I can extract from these grains. Since the water is nowhere near 170’F I have no fear of extracting tannins.
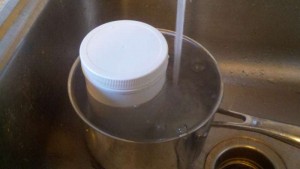 A little hot tap water encourages the liquid malt extract to become suitably viscous for pouring from the can. Stripping off the label now reduces cleaning later. I usually let it sit for five minutes or so, drain it off, then refill with fresh, hot water.
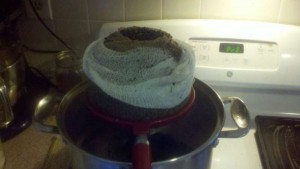 After the grains have steeped for a suitable amount of time, I agitate them one last time then suspend them above the kettle using my small stainless steel mesh strainer. Once it finishes draining I remove the can(s) of liquid malt extract from their warming pot and use that water to sparge (rinse out) any last vestiges of goodness from my grains. I shoot to get the volume after sparging to be (# of cans of LME)+1 quarts less than capacity. In this case, 1+1=2 so I returned to 8 quarts.
*PRO TIP* use the inverted pot lid to remove the strainer and grain sack to the sink without spilling a drop!
Grain removed, it’s time to fire the kettle. Crank the heat source to High and add the DME. 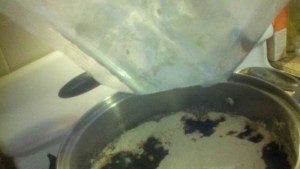 You read that correctly. DME can safely be added to 160’F wort (it’s technically wort now that the grains have been steeped) without worry, even with the heat cranked up to eleven. This is because it tends to float at the top of the pot. In order to scorch, it’d have to be near the metal at the bottom. Since we’re nowhere near a boil, there’s no worrying about boilover either. DME actually dissolves more readily in liquids that are not at a boil. Just grab a handy whisk and stir it in. The whisk helps to break it up more easily than the spoon.
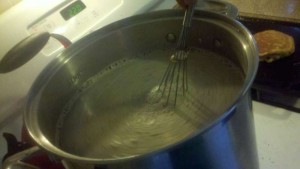
This takes just a few minutes. Once dissolved, your risk of a boilover goes down significantly. Put on the cover to help speed the time to a boil. With my stove, this takes about ten minutes.
There’s no time for sipping mimosas! Use this time to deal with the grain-filled muslin bag! Some people will just bin the whole thing but not I. 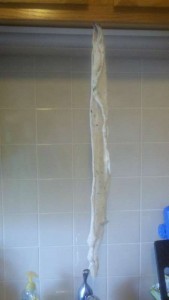 There’s life in that sack and I don’t want to waste it. Simply move the whole thing to the trash can, invert, evert, knock away the majority of the grains, then rinse well. The key is to immediately hang the sack somewhere so that it dries out. A moist sack is a moldy sack. I have a convenient hook over my sink for draining cheeses and it works just fine for this purpose. When it’s in the way I move it over to my coffee mug hooks on the side. In just a few hours it will be dry. Then just knock away the remaining grain hulls. It is as good as new!
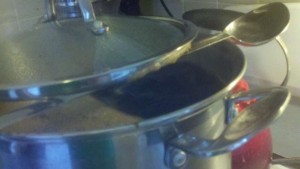
Now approaching a boil, we return to the brew kettle. It is time to add the LME. I listen to the sounds of bubbles forming on the bottom of the pot. When it is just starting to boil, I kill the heat and add the LME using the spoon to scrape all of the goodness out of the can. It should be easier to pour because we warmed it up earlier. Each can is about a quart of volume added to the pot. Unlike the DME, LME is very thick and sinks right to the bottom of the pot. If heat were continually applied, it’d be likely to scorch while we were scraping the shy LME out of the can. Since the heat is off there is no rush. Do a good job, then stir the LME into solution. When the bottom of the pot feels no thicker than the rest, turn the heat back to High.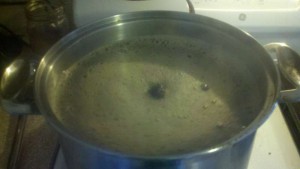
If you are standing right next to the pot and paying constant attention to your kettle, you can decrease the time to boil by keeping the lid on. Walk away for a second and that’s the precise moment when the boil will become a boilover. These take extra time to clean and are best avoided. I don’t wait for a full rolling boil. The first few bubbles breaking through the surface are sufficient for my purposes.
Once boil is confirmed, waste no time adding the bittering strike! 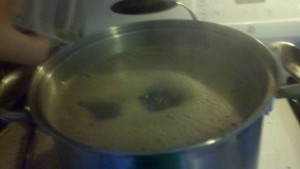 The malt extract has already been boiled once and yielded a hot break at the brewery. The copper finings we add later will isolate any that the fresh grains contributed.
Hop additions frequently cause a rapid rise in head due to the increase in nucleation sites for steam on the verge of coming out of solution. My solution is to turn the heat down and have the whisk at the ready with a spray bottle of cold water standing by. Well, I would have a spray bottle if I wasn’t so confident in my technique. There was no boilover today due to the hop strike.
 For the duration of the boil I prefer to keep the lid ajar. To do so I lay the spoon across the pot and balance the lid on the edge of the pot and the spoon. It is not really balancing as it is quite secure. The gap allows DMS-precursors a chance to escape along with the steam. The spoon ensures that the lid can’t settle back into place to create a seal that leads to a boilover. I really don’t like cleaning up after boilovers.
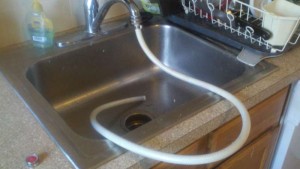
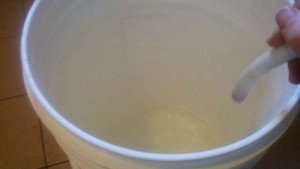
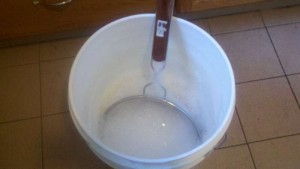
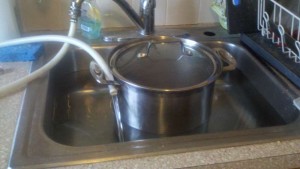
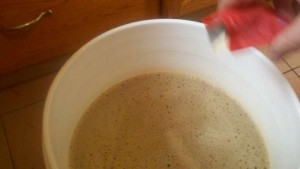
The boil proceeds with the scheduled hop, chocolate, and process aid additions. When I add the copper finings (Whirlfloc is a concentrated form of irish moss), I prepare the fermenter. This is simply filling the fermenter to one gallon and adding .2 oz of StarSan. I love the foam. Where it clings, it kills. Filling the fermenter is made easier by using a special hose I created to fit to my sink faucet. It is such a simple thing that makes the brew day that much easier. Although not pictured, the lid definitely got sanitized as well. The strainer, the laboratory thermometer, and the airlock are all in there too under the foam.
The aromatic hop strike is the signal to fill the sink 2/3 with cold water. Ice is unnecessary as we’re not trying to drop the temperature all the way to pitching temperature. All we have to do is get it below 160’F so that when we top up to five gallons with cold water the temperature is somewhere below 90’F.
At the end of the boil, kill the heat and move the whole pot (with hot mits!) to the sink. Let it sit there for about ten minutes while you set up the fermenting bucket. Sometimes I save the sanitizer; today I did not.
 Splashing the hot wort through the strainer gets some people’s knickers in a twist. I have never noticed any off-flavors due to so-called hot-side aeration. Sure, the wort is probably not absorbing as much air as it could if it were cooler but I have found it to be sufficient. I also introduce air by intentionally splashing the additional cold water into
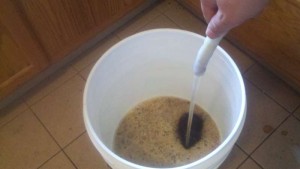 the wort. When topping up, I typically shoot for 5¼ gallons to make up for loss to trub. Since I was a bit light on extracts today I decided not to.
With the fermenter full I check the temperature one last time. As usual, well below the 90’F mark. I don’t worry about getting down to fermentation temperature. The yeast can easily handle the temperature and the whole thing will acclimate to room temperature by the time the yeast really get started. I tend to prefer dry yeast for the ease and convenience, frequently electing to skip the rehydration step. Instead I sprinkle the yeast onto the top of the wort saying “Go to work, little buddies!”. They then sit atop the surface tension, absorbing the pure water to rehydrate before dropping down into solution.
Pitching the yeast is not the end of the brew day. Nor is fitting the lid and fixing the airlock. The brew day is not over until the area is cleaner than when you started. Take ten minutes and put the containers in the dishwasher, knock the strainer directly into the trash and clean that too. All that remains is the brew kettle which, so long as I didn’t scorch anything, is just a quick job. Put away the chemicals and aids. Leave the pot to dry on the stove. Use the sanitizer to sanitize all of the countertops. It works great! And, for the extra bonus points that ensure you’ll live to brew again, take out the trash and replace the liner. Finally, move the fermenter into the brewing area. The gentle rocking will encourage any yeast still hanging on the surface to drop down and get to work.
Now you’re done.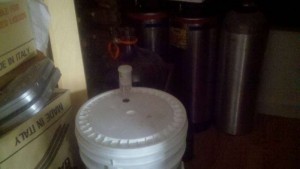
Final Thoughts
Cleaning as you go is essential to wrapping up the brew day quickly and efficiently. There is nothing as discouraging as finishing a brew and having another hour of hard labor. By addressing messes in the spare moments between active brewing you can make the final clean light and easy. For this brew day I pitched the yeast at 9:50 am and was delivering the trash to the bin at 10:05 am.
You probably noticed that I didn’t take a hydrometer reading. For extract, I don’t see a reason to. In my experience the extract always delivers you to target. The only question is how efficient I was at extracting the goodness from my specialty grains. I’m confident that I’ll get enough for the color, flavor, and body contributions I expected. If the fermentation stalls, I’m not anticipating it being a question of the wort. I’m expecting it to be a yeast issue and will start troubleshooting from there.
In general, the fewer implements you need to accomplish the task at hand, the less you’ll have to clean at the end. My extract setup relies on the magic of a concentrated boil. Less thermal mass to heat up and less to cool down. Simplify the equipment and focus on the more interesting aspects of brewing such as recipe design and yeast management.